
In this short video, Handyman Problem Fixer gives a crash course on reading a tape measure. These basics matter for cutting boards, hanging shelves, and verifying the dimensions of replacement parts.
Watch the Original Video

Watch directly on YouTube. This article is a companion resource based on the video title and description with additional general guidance; it is not a full transcript.
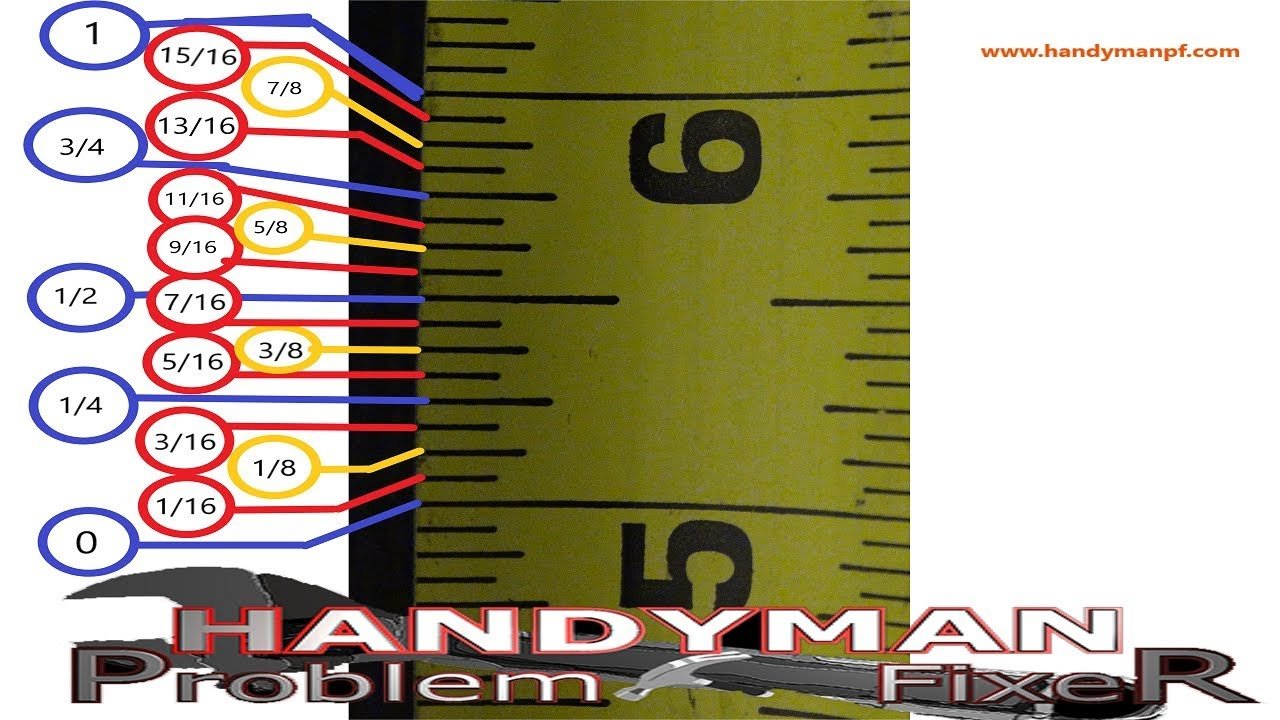
Understand the mark lengths
On many imperial tape measures, the numbered marks show whole inches. The longest unnumbered mark halfway between two inches usually marks a half-inch. Progressively shorter ticks show quarter, eighth, and sixteenth-inch increments. Metric tapes use a different set of marks, so check which scale you are reading.
Practice fraction reading
A tick three sixteenths beyond 2 inches is 2 3/16 inches. One-half inch equals 8/16; one-quarter equals 4/16; three-quarters equals 12/16. Reducing fractions helps make a measurement easier to communicate.
Take a clean measurement
Keep the tape as straight and level as possible. Look directly above the line instead of from an angle, and do not let the tape sag across a long opening. For important work, mark and check a second time before cutting.
Know when precision matters
A loose hook or damaged tape can make a project inaccurate. The hook may move slightly by design to account for inside-versus-outside measurements, but a bent tip is not reliable. Use a suitable square or caliper when the job demands greater precision.
Start by identifying the scale you are using
Before reading tiny marks, confirm whether the face of the tape is marked in inches, centimeters or both. Some models print imperial measurements along the top and metric along the bottom. Inches are divided into fractions such as halves, quarters, eighths and sixteenths, while centimeters are divided into ten millimeters. Mixing those systems halfway through a project causes errors that are difficult to spot until pieces no longer fit. Pick one system for the entire cut list and write the unit next to every important measurement. A note that says “17 3/8 in.” is much safer than “17.375” if somebody later assumes the number is in centimeters.
Look for the inch numbers first. On a common inch-based tape, the long numbered line marks a full inch, and the middle line halfway to the next number marks a half inch. Each smaller division further splits the space. Not every tape prints all the fractions, and some mark sixteenths with very short lines, so good light matters. Hold the tape where you can see the ticks without tilting your head far to the side. If the hook is on an uneven surface, reposition the tape before interpreting the marks.
A repeatable method for counting sixteenths
Imagine the interval from 3 inches to 4 inches as sixteen equal steps. Each step is one sixteenth. The eighths fall every two steps, the quarters every four, and the half inch at step eight. That creates an easy reference pattern: 3 1/4 inches is four sixteenths beyond the 3; 3 1/2 is eight sixteenths; 3 3/4 is twelve sixteenths. The smaller marks fill the gaps. You can count from the preceding whole inch or begin at an easily recognized long mark, then add the remaining increments.
| Fraction | Sixteenths | Decimal inches |
|---|---|---|
| 1/16 | 1/16 | 0.0625 |
| 1/8 | 2/16 | 0.125 |
| 1/4 | 4/16 | 0.25 |
| 3/8 | 6/16 | 0.375 |
| 1/2 | 8/16 | 0.5 |
| 5/8 | 10/16 | 0.625 |
| 3/4 | 12/16 | 0.75 |
| 7/8 | 14/16 | 0.875 |
Practice on a few imaginary projects
Suppose a shelf opening measures just past 24 inches, at the quarter-inch line. Write down 24 1/4 inches, not merely “24 plus a little.” If a replacement board needs to be that wide, check whether the installation requires a clearance allowance before cutting. In another example, a bracket aligns at the seventh short sixteenth mark after 5 inches. That is 5 7/16 inches. Seven and sixteen have no common divisor, so that fraction is already in simplest form. A mark at eight sixteenths simplifies to one half; at ten sixteenths it simplifies to five eighths.
Try the same method with measurements that cross an inch boundary. If a piece measures 11 13/16 inches, the whole-inch part is 11 and the remaining thirteen ticks are measured within the next inch. Do not round everything to the nearest quarter just because the smaller marks are harder to read. An error of one eighth on each of several parts can create a noticeable gap. On the other hand, not every project truly needs one-sixteenth-inch resolution; measuring for rough outdoor landscaping is different from fitting cabinet trim.
Inside and outside measurements are not identical tasks
For an outside measurement, you often hook the metal end over the far edge of a board and pull the tape straight across it. For an inside measurement between two walls, the hook may contact the near wall while you extend the tape toward the opposite surface. The end hook has a small amount of movement on most standard designs to help compensate for the thickness of the hook when pushed or pulled. That movement is intentional; a loose, bent or torn hook is not. Compare the tape to a trusted ruler or square if you suspect damage.
Do not assume the body of the tape case is exactly the length printed on an old sticker. Some tape measures have a case-size mark that allows you to add the case length for an inside reading, but only use that method if the manufacturer specifies it and you understand the math. If you are inexperienced, an inside measurement can often be checked with a separate ruler or by making reference marks on a scrap piece. Measure twice from consistent reference points rather than combining methods that cannot be compared.
Marking a cut line accurately
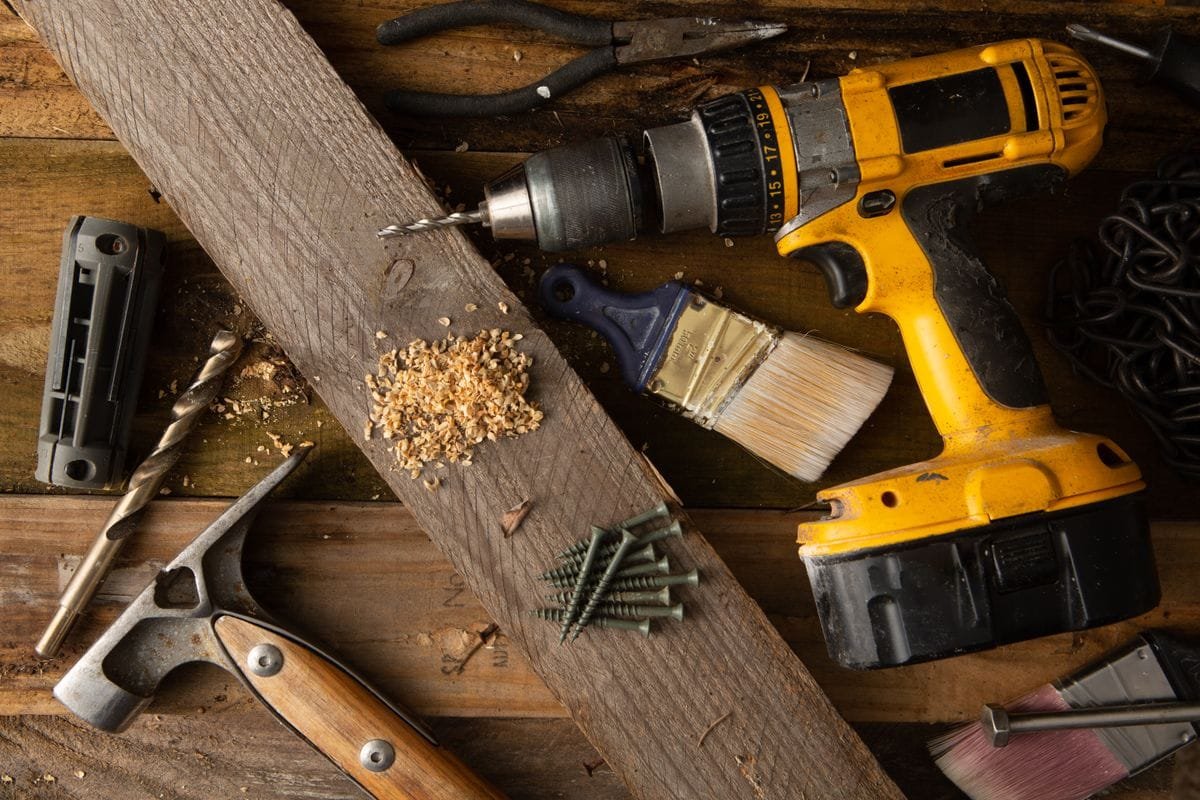
A clean measurement can still turn into a poor cut if you mark carelessly. Use a sharp pencil or a fine marking tool appropriate for the material. Keep the tape straight, place the pencil exactly at the chosen tick and mark the same reference edge every time. On lumber, a speed square or combination square can help extend a perpendicular line across the board. When cutting, remember that a saw blade removes material; the kerf can change which side of a pencil line you want to leave behind. Follow the cutting tool’s instructions and secure the workpiece.
For repetitive cuts, a stop block or jig may give more consistent results than measuring every piece independently. First make one correct sample, check it where it will be installed and then use it as a reference. On trim and cabinetry, walls may not be square and nominal dimensions may not match the real opening. Measure the actual location instead of relying solely on a plan drawn elsewhere. Keep eye and hand protection appropriate to the cutting process, and never hold a tape near a running saw blade.
How to measure longer spans without a misleading sag
When the tape extends across a room or worksite, sag and twisting can hide the true length. Use a second person to hold one end or choose a supported path when possible. Check that the hook has not slipped off its anchor point. If the measuring blade bows, do not blindly trust a long reading. For larger indoor distances, a laser distance measure may be useful, but it comes with its own line-of-sight, surface and accuracy limitations. A tape is still useful for confirming key dimensions.
On a vertical measurement such as the height of a door opening, keep the hook at a clear starting point and read with your eye level at the mark. A floor that slopes, bowed trim or a wall that is not plumb can produce different measurements depending on where you place the tape. Make several readings at the positions that matter to the project. Write them down immediately; a collection of nearly identical fractions is hard to remember while also handling materials and tools.
Metric marks: a useful second language
If your tape carries a metric scale, remember that one centimeter equals ten millimeters. The small subdivisions between centimeter numbers usually represent millimeters. A reading of 25 centimeters and 6 millimeters is 256 millimeters. One inch is exactly 25.4 millimeters, so converting a detailed imperial measurement to metric may produce a decimal millimeter result. Conversion is possible, but mixing units while actively cutting creates avoidable confusion. Whenever practical, keep one measuring system from the first sketch to final assembly.
Some imported tools and hardware are specified in millimeters, while common U.S. lumber and many building dimensions are expressed in inches. For fasteners, the width of a screw head is not its nominal diameter, and a tape measure is often not precise enough to identify a thread pitch. Use a caliper and thread gauge for that task. The tape is best at lengths and layout, not at pretending to be a precision machining instrument.
Check your tape before a critical job
A basic tape measure needs simple maintenance. Keep the blade reasonably clean and dry, let it retract under control instead of snapping violently into the case, and inspect the hook for damage. A kinked steel blade or badly worn marking can be enough reason to retire the tool from precision layout. Test the first inch against a known ruler, then compare a longer section so you do not miss a problem that appears farther along the blade. If you own two tapes, compare them before starting a job that depends on closely matched parts.
Some measurement mistakes are caused by the worker, not the equipment. Reading from the wrong side, treating an eighth as a sixteenth and copying a number incorrectly are common. Say the measurement aloud and write it in a consistent format such as “42 5/8 in.” A helper can read the note back before the cut. The extra few seconds are usually cheaper than replacing material.
Quick troubleshooting for common errors
If a measured board consistently ends up too long or short, check the starting point and whether the hook is being pushed or pulled properly. If the marks appear inconsistent, make sure you are not reading the metric scale by accident. If the fraction seems difficult to express, count the smallest marks, then reduce the fraction after recording it. A space that measures 19 10/16 inches should normally be written as 19 5/8 inches. If the measured object is angled, check that the tape follows the intended straight line rather than a diagonal path.
For an opening that varies in width, measure near both ends and the center before choosing a cut size. For drywall or trim, confirm how much clearance the installation actually requires. A precise measurement is only one piece of an accurate fit. Material movement, wall conditions, fastening method and the cutting tool all influence the result. Slow, deliberate measuring is not a sign of inexperience; it is a practical way to avoid rework.
Final ten-minute practice session
Take a scrap board or a cardboard strip, choose ten random points between two whole-inch marks and record each one to the nearest sixteenth. Then check your notes against a second tape or ruler. Include easy marks like one half, but also choose irregular ones like five sixteenths and eleven sixteenths. Next, mark three lengths on the scrap, square the marks across it and compare where each line falls. Practice keeping the hook seated and the blade straight.
Once the marks become familiar, you can move more quickly without sacrificing accuracy. Rewatch the original video at the top of this guide whenever you need a visual refresher. Read the markings of your own tape rather than assuming every manufacturer prints them identically. The goal is not to memorize dozens of decimals: it is to understand what the lines mean, record the correct units and make the same measurement twice with confidence.
Tools and Products Linked in the Original Video Description
Affiliate disclosure: As an Amazon Associate I earn from qualifying purchases. Handyman Problem Fixer may earn a commission from qualifying purchases made through affiliate links, at no additional cost to you. Older linked products may have changed or become unavailable.
Check fitment, safety instructions, and current product listings before ordering. Find more tutorials in our video library and DIY repair guides.


0 Comments