
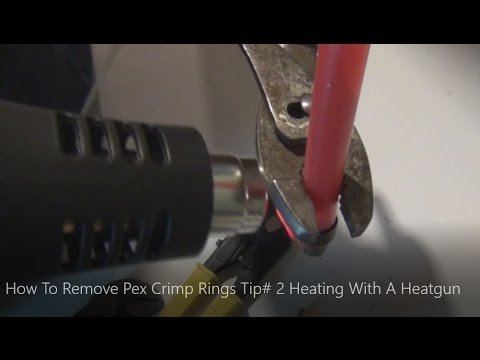
This follow-up video explores using heat while removing PEX from a brass fitting and points viewers toward the creator’s tubing and ring-cutting tools. Heat is not suitable for every PEX system or location, so the safest method depends on the specific materials and manufacturer’s instructions.
Watch the Original Handyman Problem Fixer Video

Watch on YouTube. This is an independent written companion guide based on the video description and general repair guidance, not a word-for-word transcript.
Why heat is a concern
PEX is a polymer material, and uncontrolled heating can soften, deform, or otherwise compromise it. Heat guns can also ignite nearby combustible building materials, damage insulation, and burn skin. A method that appears to work in one demonstration should not be generalized to every installed fitting.
Prepare the connection
Isolate the line and release water pressure before working. Determine the brand and material of the tube and fittings. If the installation is in a wall cavity or near wiring, insulation, or other combustible materials, avoid improvised heating and consider professional service. Never use an open flame on PEX.
Consider a dedicated cutter first
A properly matched ring-removal tool and tubing cutter generally give better control over cut depth and avoid unnecessary heat exposure. Check that tools are compatible with the ring size and fitting style. Follow the exact maker procedure instead of forcing the joint apart.
Reassembly and checking
Old crimp rings should not be reused. Verify whether reuse of the underlying fitting is expressly permitted; inspect for any nick, deformation, or signs of overheating, and replace uncertain components. Assemble with fresh approved components, check the crimp gauge, restore pressure gradually, and check for leaks.
Product links from the original video
Affiliate disclosure: As an Amazon Associate, I earn from qualifying purchases. These links were originally shared with the demonstration and may lead to changed listings. Check current specifications, compatibility, and safety guidance before ordering.
See more tutorials in the Handyman Problem Fixer video library.

0 Comments