
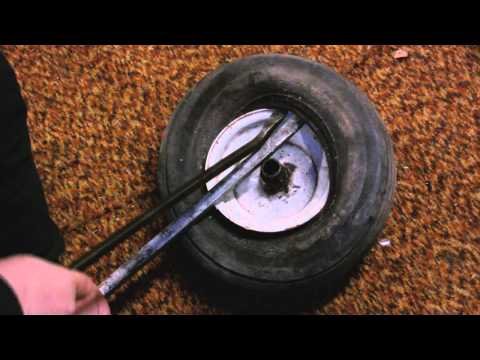
Changing a small lawn mower tire may look simple, but it can become frustrating when the tire bead sticks to the rim. Before you reach for tire irons, check whether the tire is tubed or tubeless, how the wheel mounts, and what the tire and wheel manufacturers allow.
Watch: Dismount and Mount a Lawn Mower Tire With Hand Tools

See the original Handyman Problem Fixer tire video for a visual reference. This companion guide covers general preparation and safety considerations rather than claiming to reproduce every demonstration step.
What to Check First
- Read the tire sidewall for its size, type, and rated inflation pressure.
- Confirm whether the wheel uses a tube or a tubeless valve stem.
- Check for rust, bends, cracks, sharp edges, or corrosion on the rim.
- Inspect for punctures and determine whether a tire replacement is actually necessary.
- Gather tools designed for small tires and compatible, manufacturer-approved tire lubricant.
Preparing the Wheel Safely
Park the machine on a stable, level surface, shut it down, remove the ignition key, and follow the owner’s manual for lifting and securing it. Support the mower securely rather than relying on a jack alone. Fully deflate a tire before attempting to break the bead or use tire irons. Never cut or grind on an assembled pressurized wheel.
Understanding the Tire Bead
The bead is the reinforced edge that seats against the rim. It can stick after years of use, especially when the rim has rust or dried sealant. The usual general sequence is to safely remove the wheel, deflate the tire, free the bead using appropriate tools, and carefully lift the bead over the rim without tearing it or damaging the wheel. The exact procedure depends on the wheel and tire design.
Inspect Before Reassembly
Clean the rim only with methods approved for the wheel material. Replace any cracked or severely corroded rim, damaged tire, or questionable valve stem. Tubes must match the tire and wheel specifications and must not be pinched during assembly. Do not use makeshift lubricants that can damage rubber or promote tire slip.
Inflation and Bead Seating Require Special Care
A tire or wheel can fail violently during inflation. Keep clear of the sidewalls, use an appropriate pressure gauge and rated equipment, and never exceed the tire or wheel maker’s limits. If the bead is difficult to seat or the wheel’s specifications are uncertain, stop and take it to a tire professional. Never use flammable sprays or ignition to seat a bead.
When to Choose a Tire Shop
Professional help is sensible for split-rim or multi-piece wheels, damaged rims, stubborn beads, mismatched tires, or any setup that lacks a safe inflation method. A small equipment tire is not worth an injury.
Tools and Affiliate Links From the Original Video Description
Affiliate disclosure: As an Amazon Associate I earn from qualifying purchases. If you buy using an affiliate link, Handyman Problem Fixer may receive a commission at no extra cost to you. Product availability and prices may have changed since the video was published.
Explore more repair videos and DIY how-to guides from Handyman Problem Fixer.

0 Comments