
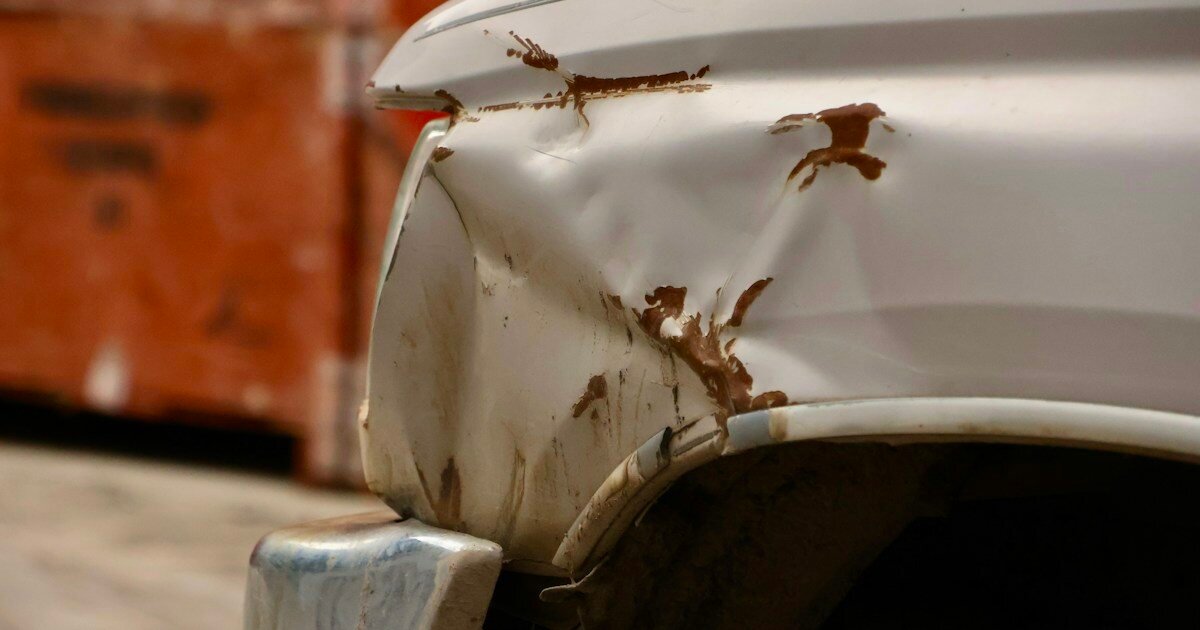
Door rust often begins out of sight at a folded seam or a blocked drain. By the time paint bubbles are visible on the outside, corrosion may have spread underneath. A good repair decision starts with checking how far the damage extends, not just sanding the most obvious spot.
Find the source of trapped moisture
Inspect the lower door edge, inside seam and drain holes with a flashlight. Dirt and leaves can block water escape routes. Open a clogged drain gently with a manufacturer-approved method; do not drill random holes or damage a wiring harness. Check the weather seal for damage.
Decide whether repair is cosmetic or structural
A small patch of surface oxidation is different from perforated metal, detached seams or badly corroded hinges and latch mounts. If the lower edge flexes, metal crumbles, or the latch area is affected, ask a body shop about safe repair or replacement. Paint cannot restore missing steel.
Prepare the area correctly
Wash away dirt and road salts, dry thoroughly, protect nearby trim and follow product safety labels. Sanding may expose hazardous dust; use appropriate respiratory, eye and skin protection and avoid doing the work near people or pets. Follow coating-system directions for bare-metal preparation, primer, seam sealer and topcoat.
Do not trap moisture under filler
Filler placed over active corrosion, loose metal or a leaking seam may hide the problem temporarily. A sound repair addresses the damaged metal and keeps drainage paths clear. If welding is needed, account for nearby wiring, trim and flammable material; a trained professional may be the safer choice.
Aftercare
Inspect the repair after the first winter wash and keep the door’s drain passages clear. A few minutes of maintenance can reveal whether the underlying moisture issue has really been solved.
Why door rust hides longer than you think
Paint bubbling at the bottom of a car door is often the last visible stage of a longer moisture problem. A typical door is made from shaped metal panels joined at folded edges, with drainage paths and trim that keep routine rainwater moving outward. Dirt, salt, and blocked drains can leave moisture trapped against the interior of those seams. The outside finish may look acceptable while corrosion continues on an inner lip. That is why sanding a bubble and applying touch-up paint sometimes produces a temporary improvement rather than a lasting repair. The smartest first step is to understand the extent and direction of damage. Check the lower seam, inside-facing lip, water drain points, and nearby weatherstrip without cutting or grinding yet. Photograph both sides, including areas that appear sound. Those images can help you decide whether the work is a small preventive repair or a more complicated metal and coating problem that a body shop should evaluate.
Decide whether you are looking at surface oxidation
Not every brown stain means the door is beyond saving. Light surface oxidation can appear after a paint chip or exposed edge admits moisture. Metal may still be solid and keep its original shape. More severe corrosion produces layered flaking, a swollen folded seam, pinholes, or weak areas that deform easily. If you can see daylight through the metal, the repair is no longer just a matter of removing discoloration and repainting. A careful inspection should avoid making the damage worse: do not aggressively jab thin metal, lean on a severely weakened panel, or scrape around a delicate electrical harness. The goal is assessment, not proving how much metal can be broken off. Where door latches, hinges, side-impact structures, or other safety-critical features are affected, stop and seek qualified professional guidance. Surface repair products cannot restore mechanical strength to perforated or severely weakened metal.
The lower seam is the first place to inspect
Open the door fully in a safe location, then examine the folded metal seam along the bottom. Use a flashlight and, when useful, an inspection mirror. Look for a swollen edge, flaking paint, staining around drain openings, cracked seam sealer, or signs that water has remained trapped. A door can have a clean-looking outer skin while the interior fold has accumulated grit. Compare the front and rear portions of the lower seam and, if possible, the corresponding door on the opposite side. Differences can help identify where moisture concentrates. Do not seal over drainage slots in an attempt to keep water out. Doors are commonly designed to manage some water internally and let it drain. Blocking that path can accelerate corrosion. When an opening is clogged, consult service information for a safe cleaning method rather than enlarging it with a drill. Good drainage is essential to a durable repair.
Check drains, weatherstrips, and water entry paths
A repaired outer surface may rust again if water continues collecting in the same place. Examine weatherstrip condition and any tears, detached clips, or flattened sections. Inspect drain openings for leaves, road grit, wax buildup, and paint debris. Avoid using a hard metal tool that can puncture a seam or damage internal parts. Some vehicles have protective membranes behind the inner door trim; disturbing them can create a water path into the cabin. Before removing anything, consult the model-specific service guidance and note whether the door contains airbags, wiring, window regulators, or other mechanisms. If rainwater is entering the passenger compartment or the door remains unusually wet days after washing, the issue may be more complicated than an exterior paint chip. A repair plan should include correcting the underlying path of moisture instead of simply hiding the stain that appears outside.
Photograph the damage before you buy materials
A few deliberate photographs can save money and frustration. Capture a close-up of the most obvious rust, a wider view showing the panel, the lower seam with the door open, and any matching damage on nearby rocker panels or wheel arches. Include a ruler or familiar object for scale without pressing against fragile metal. Record whether the problem was present after a collision, recent door replacement, or winter exposure. Photos can help a body shop evaluate whether replacing the door skin or assembly is more practical than trying to patch it. They also provide a baseline when inspecting the finished work months later. Do not rely on photos alone if the problem affects a latch, hinge, or side-impact area; those deserve direct professional inspection. Documentation is not a substitute for skill, but it turns a vague “rust spot” into a more useful repair discussion.
Door rust is different from rocker-panel rust
Although both problems can appear along the lower side of a vehicle, a door skin and a rocker panel may serve different mechanical and structural functions. A door outer skin is one part of a larger assembly containing reinforcement, latch hardware, and sometimes side-impact components. The rocker and adjacent sill may contribute to the vehicle’s body structure, including crash performance and support points. A repair technique acceptable on a nonstructural cosmetic surface is not automatically appropriate for a rocker, pillar, hinge mount, or reinforced section. If you find corrosion spreading from a door to the sill, investigate both areas independently. Never assume that covering a hole with body filler, sheet metal, or angle iron restores the designed strength. For damaged structural components, follow the manufacturer’s repair manual and use a properly qualified collision-repair facility. That distinction protects more than the appearance of the car.
Before removing interior door trim
Sometimes inspection requires looking behind a door panel, but trim removal is not a casual step on every modern vehicle. Airbag components, electronic connectors, glass, cables, and fragile plastic fasteners may be present. The specific vehicle’s service instructions determine the safe process and any battery-disconnection precautions. Do not tug on a panel simply because a video for a different model looks similar. Photograph connector locations, organize fasteners, and stop if an unknown component appears. A damaged water shield behind the trim can create future leaks even if the rust repair is successful. If you only need to examine exterior surface bubbling and drain condition, opening the entire door assembly may be unnecessary. The best repair is not always the one that involves taking the most parts apart. Plan each disassembly step with a clear purpose and a method for restoring the parts to their intended condition.
Choosing between an honest repair and cosmetic concealment
A proper repair addresses the actual corrosion, prepares stable surfaces, and restores the coating system. A cosmetic concealment may simply cover a hole or blister with filler and paint. The second approach can make a panel look better briefly, but it does not replace metal that has disappeared or seal an active moisture path. If the affected area is small and solid, a carefully prepared surface repair may be feasible with appropriate equipment and materials. If metal has perforated around a folded seam, replacing the affected section or door assembly may provide a more reliable outcome. Ask a body shop to explain which metal will remain, which seams can be restored, and how inaccessible surfaces will receive protection. A glossy outer finish means little if bare interior metal is exposed to another winter of salt. Long-term durability is the real measure of success.
What sanding can and cannot accomplish
Sanding removes loose coatings and prepares sound surfaces for an appropriate refinishing system. It is not a method of turning missing metal into intact steel. Aggressive grinding can thin a marginal panel, create heat, and spread hazardous dust and debris. Use the tool and abrasive specified by the coating system, protect your eyes and respiratory system, and keep bystanders away. Painted surfaces may contain materials that require special handling, particularly on older vehicles or previous repairs. Never assume all coatings are harmless. If a thin edge begins breaking away or revealing holes during gentle preparation, stop and reassess whether the repair needs metalwork. Trying to sand until every discoloration disappears can remove more sound material than necessary. A controlled approach should expose the repair’s true condition without creating a larger structural problem. Follow product technical data sheets for surface preparation rather than guessing from a generic video.
Rust converters are not magic metal replacement
Products sold as rust converters, neutralizers, or encapsulators serve different purposes and have different preparation requirements. Some are intended for tightly adhering residual oxidation under a specified coating system. Others work best on thoroughly cleaned metal. None should be treated as a substitute for fixing large perforations or seriously weakened structure. Read the product’s technical data sheet, compatibility guidance, drying requirements, and protective-equipment instructions before applying anything. Mixing unrelated brands of primer, converter, filler, and sealer without checking compatibility can lead to peeling or trapped moisture. A thin film that looks dark and uniform may still hide loose corrosion beneath it if surface preparation was inadequate. For visible cosmetic areas, test the chosen process on an appropriate sample or seek professional guidance. The objective is a stable, compatible coating foundation, not simply making rust change color. Surface chemistry cannot compensate for a panel that has lost necessary strength.
Primer choice and coating compatibility
Automotive primers are designed for different substrates and subsequent coatings. A direct-to-metal epoxy system, an etching product, a surfacer, and a rust-treatment product are not interchangeable merely because they are all called primers. The correct choice depends on the manufacturer’s instructions, the exposed material, and the intended repair. Some products require specific time windows, sanding steps, or topcoats. Follow their safety data and technical data sheets, particularly in relation to ventilation and protective equipment. Painting in a poorly ventilated home garage can create serious exposure and fire risks. Never spray a product requiring professional respiratory protection without the proper controls. For a small cosmetic repair, a professional paint supplier may be able to help assemble a compatible system rather than a pile of unrelated cans. More layers do not automatically mean more protection. Coatings perform as a system when each layer is properly prepared and applied.
Why seam sealer matters on folded edges
An automotive door contains overlaps and folded joints where moisture can enter if the original barrier fails. Seam sealers are engineered to close appropriate joints and reduce water intrusion, but they should be used in the locations and sequence recommended by the repair procedure. Applying sealant over active corrosion, loose paint, or a drainage opening can trap a problem rather than solve it. Manufacturer service information matters because not every opening is supposed to be sealed. The collision-repair supplier 3M publishes procedures for seam sealers and cautions that the exact application depends on the vehicle and repair. An aesthetically neat bead is not proof of a durable joint. The underlying metal must be suitable, products must be compatible, and the door must still shed water as designed. If a seam has separated or perforated, ask whether metal repair or replacement is necessary before sealing anything.
Restoring protection inside the door
Exterior paint is only one part of corrosion prevention. The inside of a door may contain hidden metal surfaces that were originally protected by coatings or cavity treatments. Sanding or repairing the visible outside can leave the interior vulnerable if those protections are disturbed. Professional repair references such as 3M and I-CAR emphasize restoring corrosion protection after body repairs, including using appropriate cavity wax where specified. The exact procedure depends on vehicle design, approved products, and how the repair was performed. Do not indiscriminately flood a door with oil or wax, especially near electrical components, drains, adhesives, or mechanisms. Select a suitable product and application method from the manufacturer or qualified repair guidance. A repair that looks perfect in photographs but has bare steel behind its seam can fail surprisingly quickly. Interior protection deserves as much planning as surface color matching.
When replacement is smarter than patching
A complete used or replacement door can sometimes offer a more practical solution than attempting to rebuild a badly perforated folded edge. That does not mean every replacement is inexpensive or straightforward. Check correct fitment, model year, body style, hardware, wiring, locks, window mechanisms, side-impact features, and corrosion condition. A used door may contain hidden rust of its own. Repairs to hinges, latch alignment, seals, or safety systems must follow appropriate procedures. A professional estimator can compare the cost of disassembly, metalwork, refinishing, and corrosion protection against the realistic price of a suitable assembly. Replacing a cosmetic panel may be sensible; replacing or modifying structural components calls for more specialized evaluation. Do not assume the cheapest online listing is a safe or compatible part. A repair decision should reflect expected service life and safety, not just how much paint will cover the spot.
Budgeting with realistic materials and labor
Before spending money, separate inspection, preparation, metal repair, primers, fillers, seam sealing, refinishing, and internal corrosion protection into distinct costs. Add consumables, protective equipment, and any specialty tools needed for the actual process. The apparent price of a small aerosol primer can obscure the total cost of a reliable repair. A professional quote may include work that is invisible in the finished photograph, such as repairing joints, restoring corrosion protection, or aligning the door. Ask for a written scope and understand which portions are cosmetic, which are structural, and how rust recurrence is handled. If a car has several rusty panels, it may be more economical to prioritize safety-critical areas and budget the remaining cosmetic work. Avoid spending a large amount on attractive exterior paint while corrosion in the supporting body remains unchecked. An honest estimate helps decide whether the car is worth the investment.
Why moisture reappears after winter
Pennsylvania road salt and repeated freeze-thaw cycles can intensify corrosion where protective coatings have been breached. A repaired door may look fine in dry weather and then develop fresh staining after weeks of wet roads. That is why aftercare matters. Keep the vehicle clean, including lower seams and wheel-splash areas, and inspect drainage points without damaging them. Check whether weatherstrips and protective films remained properly installed after work. A touch-up repair should be monitored for new bubbles, discolored runoff, or paint lifting. If those signs return, identify the cause rather than adding another coat over the previous failure. A well-maintained door may last far longer than one repeatedly patched without addressing water entry. Seasonal inspection is a small investment compared with a major repair. The goal is to detect a new problem while it remains manageable rather than discovering extensive hidden damage after another year.
Why angle iron is rarely the right door repair answer
An inexpensive length of angle iron may look like a quick way to stiffen a rusted edge, but automotive doors and surrounding body structures are engineered assemblies. Adding generic metal can create interference, concentrate forces, block drainage, change how a component deforms, or prevent protective trim from fitting. A welded or bolted reinforcement does not automatically restore factory crash behavior or door-latch performance. If the original metal has structural functions, the replacement material, joining method, and corrosion protection need to follow the vehicle manufacturer’s approved repair process. This is particularly important at the rocker, pillar, hinge, and latch areas. For a purely cosmetic outside door skin, improvised angle iron may be unnecessary and could make rust worse by trapping moisture. The right question is not “what thickness can I weld in?” but “what component failed, and what repair does the manufacturer allow?” Safety should decide the method.
Do not ignore hinge or latch problems
Corrosion near hinges, latches, locking parts, or side-impact components should be treated differently from a harmless surface blemish. If a door drops, fails to close securely, does not latch reliably, or shows severe metal loss near its attachment points, seek professional inspection promptly. Do not add body filler or a homemade welded patch and assume the safety issue is resolved. Vehicle doors must function correctly in ordinary use and can contribute to occupant protection. A damaged hinge or latch also affects weather sealing and can create new water paths, adding to corrosion. If the problem developed after a collision, a collision-repair specialist should evaluate alignment and hidden damage. The right repair may involve replacing or professionally restoring parts instead of continuing to cosmetically refinish the lower skin. Reliable closure and structural integrity take priority over appearance.
A pre-winter checklist for car owners
Before winter, open each door and inspect the bottom fold, drains, weatherstrip, and visible chips. Check for swelling along the outside paint, damp carpeting, or rust-colored streaks after washing. Photograph any problem from inside and outside. Determine whether the metal is still solid or whether perforation, damaged hinges, or latch issues require professional evaluation. Clean safe accessible drain paths according to the vehicle’s service instructions, and wash away road debris without forcing water into electrical areas. If you plan a coating repair, check manufacturer instructions and ambient temperature requirements before buying materials. Arrange appropriate ventilation and personal protective equipment. For a severely damaged door, compare professional metal repair and replacement options rather than hiding the hole with filler. After work is completed, schedule a follow-up inspection following the first substantial exposure to winter salt. This routine is simple enough to make an annual habit.
Frequently asked questions
Can I put body filler straight over rust? That is not a durable substitute for properly addressing the corrosion and substrate. Can I paint over a bubbling seam? Paint alone will not solve corrosion already spreading below the surface. Are rust converters always needed? No; product suitability depends on the repair surface and coating system. Should I drill out a blocked drain? Not without the exact service guidance, because it can damage metal, wiring, or protective layers. Do I have to remove the door for every repair? No; the necessary disassembly depends on damage location and the method. Is a rusty rocker the same as a rusty door skin? No; the rocker may play a major structural role. Can I use generic angle iron to restore strength? Do not assume so; manufacturer-approved repairs are essential for structural or safety-critical areas. Should I always buy a replacement door? Not always; compare the true condition, available parts, labor, and the expected life of each repair.
Where to find reliable repair procedures
Start with the specific vehicle manufacturer’s collision repair and service documentation, especially when the affected area includes hinges, latches, pillars, or structural panels. For industry-level process guidance, see 3M’s corrosion protection resources, its seam sealer procedures, and I-CAR’s corrosion protection overview. These sources reinforce the need to match products and methods to the repair rather than inventing a universal shortcut. Handyman Problem Fixer offers practical maintenance education, not a substitute for an OEM repair manual, qualified collision-repair inspection, or professional safety evaluation. A small cosmetic spot may be manageable; structural loss, severe perforation, or safety-system involvement should change the plan. Reviewed November 22, 2026.



0 Comments